How to Draw a Boabab Tree Out of Paper
Mosaic Baobab Tree Placemat
Step by step on how to make a mosaic baobab tree placemat, presented by Crafty Corner
For any questions contact us via email

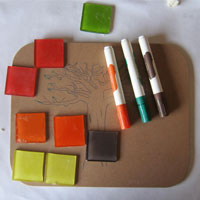
What materials you need to make a mosaic baobab tree placemat:
- Wooden placemat board
- Picture of an african baobab tree
- Carbon paper
- Pencil
- Masking tape
- Two wheel tile nipper
- Mosaic tiles (your colour selection)
- Wood glue
- Grout
- Water
- Mixing tub
- Hard foam or old credit card to use as grout applicator
- Ice cream stick
- Sponge or cloth
- Old dry towel or cloth

If you have never done mosaic before, it is a good idea to read through all the instructions first before starting this mosaic project.
Step 1
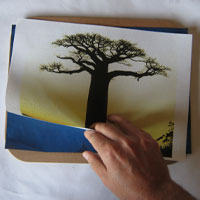
Place a sheet of carbon paper on the wooden placemat board. Then place the picture of the baobab tree that you have selected for this mosaic project on top of the carbon paper.
Step 2
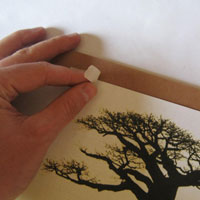
Using masking tape, tape the design onto the board. This is to make sure that it does not slip while you are tracing the baobab design in the next step.
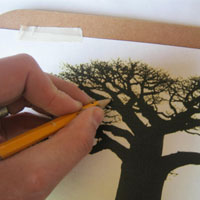
Step 3
Using a pencil, trace the outline of the baobab tree. It is difficult to pick up heavy detail in a mosaic, so don't be too afraid to simplify or remove some of the complex baobab branches. Remember to press firlmy so that the design transfers onto the placemat board properly.
It might also be hard to see or to remember where you have traced, I started at the bottom left hand corner and worked my way up the left side to the branches, across to the right, down the trunk and eventually back to where I started.
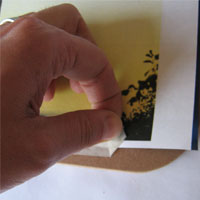
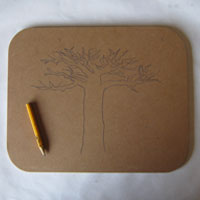
Step 4
Once you are confident you have traced over the entire baobab design, remove the masking tape and then remove the picture as well as the carbon paper. If you did a good job, you should be able to clearly see the african baobab tree on your placemat board.
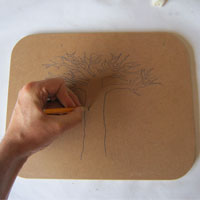
Step 5
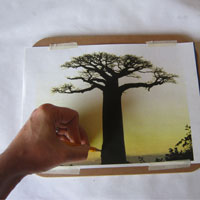
Now you can just use a pencil to add any details or branches that you may have missed while tracing the baobab tree.
Step 6
If you think it will help you, or if you are doing a design that has a lot of colours, it's a good idea to lay the colours out on the board so you can see what effect they will have on the overall look of the mosaic before you begin cutting or sticking. Once you are happy with the colours, you can use whiteboard markers to mark where you want each colour, or simply make a note on the board in pencil.
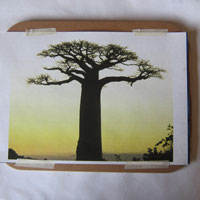
If I were to do an african baobab tree with an African sunset in the background, I would definitely plan my colours first as in the picture below.
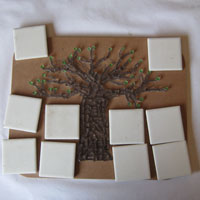
Instead of going with an African sunset theme, I have decided to keep this baobab plain. I think having a plain white background will contrast nicely with the brown tree.
Step 7
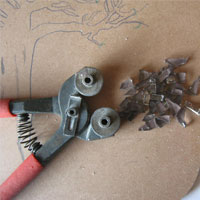
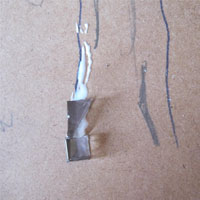
Once we have decided on our colours, it is time to start cutting! It is always a good idea to start with your main picture or with any complicated areas first, so let's start with the tree. For the tree we are going to cut brown glass mosaic tiles into small pieces. First cut the glass tiles into big pieces, and then cut them down into small random shaped bits.
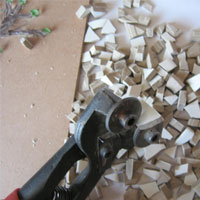
You cut the pieces by placing a mosaic tile between the two wheels on the two wheel tile nipper and giving a firm squeeze. If you are struggling to cut the mosaic tiles with the two wheel nipper, try moving your hand further back towards the end of the handle, this will give you more leverage and make using a two wheel tile nipper a little easier.

Step 8
Keep cutting brown mosaic tiles using the two wheel tile nipper until you think you have cut enough for the tree.
Step 9
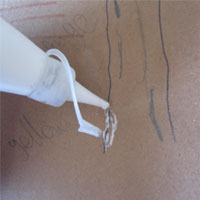
Now we need to start gluing. It is usually best to start along an edge so we can get a nice solid border around the design. Luckily baobab trees are often quite knobbly, so don't worry about getting it perfect, this will just add to the texture of the design.
Start by applying a little wood glue. You can, if you like, apply glue to each individual mosaic piece before sticking it down, but I prefer applying enough wood glue so that I can stick four or five mosaic pieces down at a time. Also be careful not to use too much glue. If you apply glue to a large area, the glue will dry before you have a chance to stick mosaic tiles over the entire area. Then when you reapply glue, this will go on top of the dry glue and cause an uneven finish. If you use a lot of glue, this can also seep into the wooden board and cause it to warp.
Step 10
Once you've applied the wood glue, find a mosaic piece and press it down into place. Then place another piece just above it and press it into place. You want the tile pieces very close together, but not quite touching.
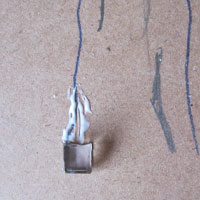
Step 11
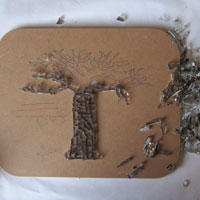
Keep sticking random mosaic tile bits into place to fill up the baobab tree trunk. I am first lining the border of the trunk and then filling in the centre to make sure I get good definition around the border of the tree in this mosaic project.

Step 12
Once you have completed the baobab tree trunk, keep going, sticking pieces into place along the branches. The branches have more detail, so you might have to cut a few pieces even smaller to make sure you get the right fit.
Step 13
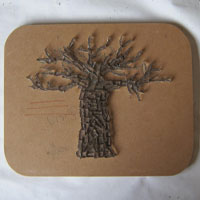
Keep going until you have finished the branches.
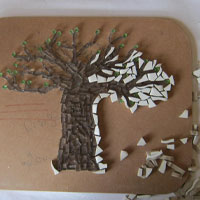
Step 14
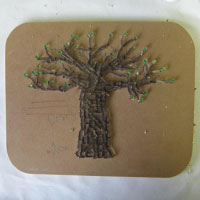
Let's try add a little more texture to the tree. Take a few green mosaic tiles and cut a few tiny pieces from the tiles and stick these on the edges of the branches. They won't make a huge difference, but will help add a little texture and depth to the mosaic project.
Step 15
Looking at the baobab, I have decided to go with a ceramic white tile. The ceramic tile has a matte finish and is slightly thicker than the glass mosaic tiles, and I think this will contrast nicely to the tree as well as add some texture.
Step 16
Now we need to start cutting again. First cut the ceramic tiles into smaller pieces, and then cut these into small random shaped bits. You want them to be roughly the same size as the mosaic bits you used for the tree. Keep cutting until you have quite a big pile of ceramic mosaic pieces to work with.
Step 17
Using glue and the white ceramic bits, start by first creating a border around the tree. This can get quite tricky, especially around the branches where there is a lot of detail. Cut the ceramic tiles smaller if you need to so that you get good definition around the mosaic baobab tree.

Step 18
Once the tree has been outlined, fill up the rest of the background with the white ceramic tiles. Be careful not to go over the edge of the board, no piece should stick out over the edge of the mosaic project. Once complete, leave the mosaic african baobab tree overnight so that the glue has a chance to dry properly.
Step 19
I've chosen to fill the mosaic project with a light grey grout. This should nicely blend and balance the dark tree and the light backgound. Measure out how much grout you think you will need. It is quite difficult to guess how much you will need, so it is a good idea to have a few smaller mosaic projects nearby that need grouting, that way if there is any left over grout you can grout another mosaic and not have to throw it away.
Step 20
If you have plastic gloves, now would be a good time to wear them. If not, try not to get too much grout on your hands during the following steps and apply a handcream when you are done.
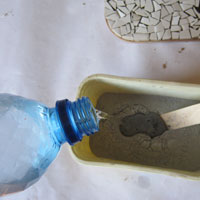
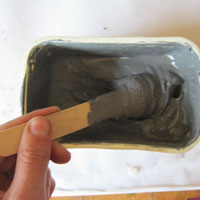
Add a little water to the grout and stir using an ice cream stick. Then add a little more water and mix again. Keep adding a little water at a time and stirring until you have a paste that is the consistency of mayonnaise or a soft toothpaste.
Step 21
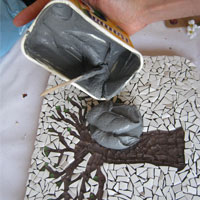
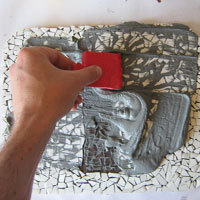
Use the ice cream stick to dump the grout on top of your mosaic baobab tree.
Step 22
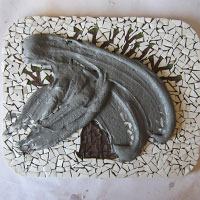
Then, use an old credit card, grout applicator or piece of high density foam to spread the grout on the surface of the board. This is a bit like spreading margarine on a slice of toast. As you spread the grout, make sure to work it into all the little cracks and spaces in between the mosaic tile pieces.
Step 23
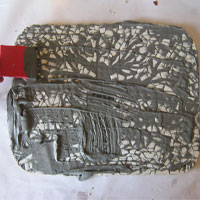
Make sure to also cover the edges of the board with grout, working the tile grout into any crevices.
Step 24
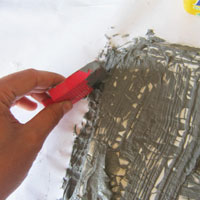
Remove as much of the excess grout as you can easliy scrape away with your grout applicator or old credit card. If there is enough left over, use it quickly and grout another smaller mosaic project you may have lying about.
If you don't have another project that needs grouting, add water to the grout and then throw it out in the garden so it can mix with the sand outside. Never throw excess tile grout down the drain, it will cause blockage.
Step 25
Leave the mosaic for 2 - 4 hours, and then use a damp cloth or sponge to wipe away any excess grout. Leave overnight to dry.
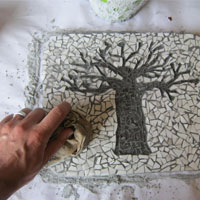
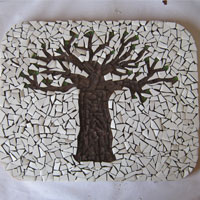
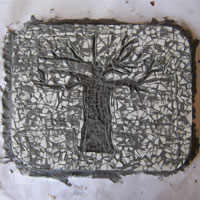
Step 26
Once the grout is properly dry, simply take a dry cloth to buff up the surface and reveal the beautiful mosaic african baobab tree placemat that you have created!
trujilloanyinquity.blogspot.com
Source: https://craftycorner.co.za/crafts/mosaic/mosaic-baobab-placemat/mosaic-baobab-placemat.html
0 Response to "How to Draw a Boabab Tree Out of Paper"
Post a Comment